Proper installation is essential for the reliable operation of automatic bollards. Accurate positioning, effective drainage, consistent height, secure electrical connections, and thorough testing all influence the performance and service life of the system.
This guide explains the main installation process for automatic rising bollards, from excavating the foundation pit to connecting and testing the control box.
This installation guide applies to standard automatic rising bollards that require an external drainage system. These bollards are equipped with drainage outlets that must be connected to a drainage well, soakaway, or site drainage system. If your project uses drainage-free automatic bollards, the foundation and drainage requirements will be different.
Installation Overview for Automatic Bollards with Drainage
Installing automatic bollards generally involves ten stages:
- Excavate the installation pit and prepare drainage.
- Measure and mark the bollard positions.
- Fabricate and secure the fixing frames.
- Establish a horizontal reference line.
- Position the bollards in the fixing frames.
- Adjust their height, center line, and vertical alignment.
- Weld the bollards in place.
- Connect the electrical cables and drainage pipes.
- Waterproof and insulate the connections.
- Test and permanently install the control box.
Each stage should be completed and checked before moving to the next one.
1. Excavate the Pit and Install a Drainage Well
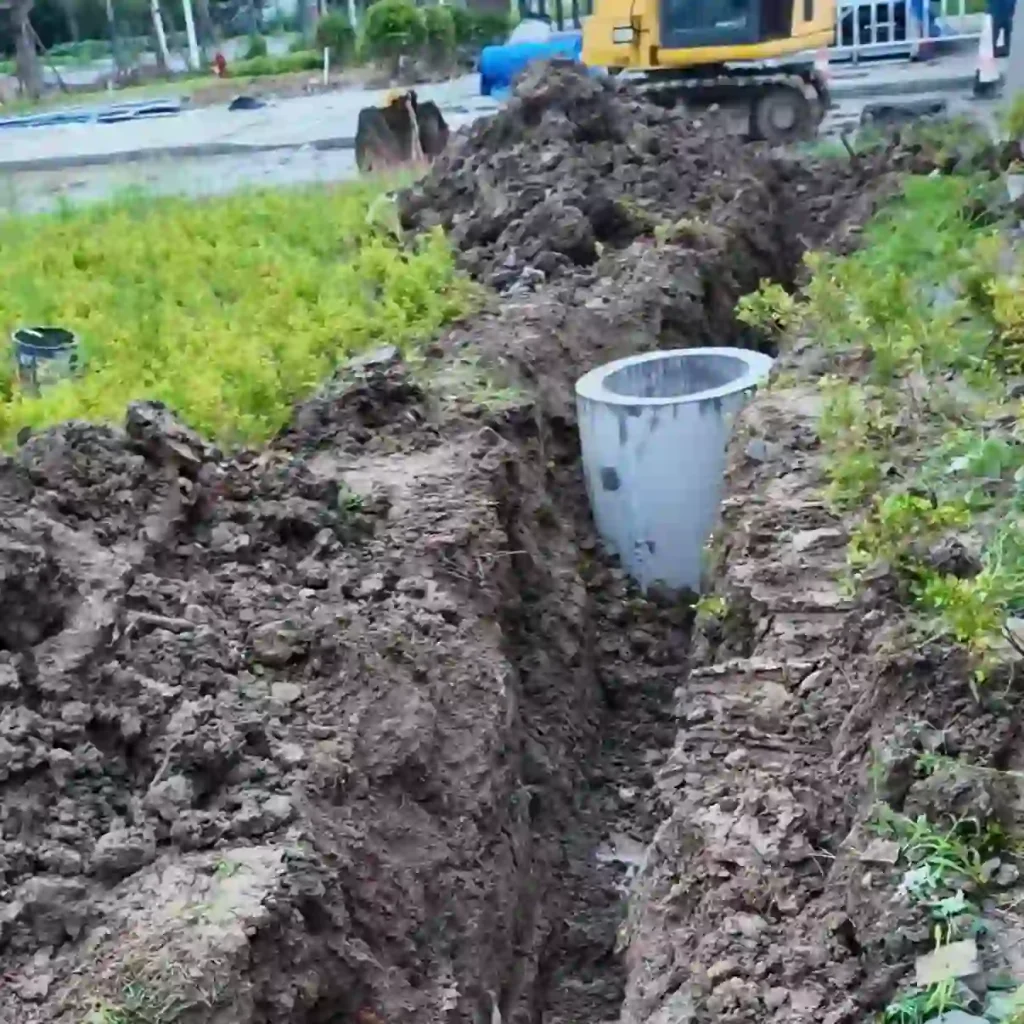
Begin by excavating a rectangular pit according to the dimensions, number, and layout of the automatic bollards. The excavation should provide enough space for the bollard bodies, fixing frames, drainage pipes, electrical conduits, and installation work.
Install a drainage well or soakaway pit in a suitable location so that water around the bollards can be collected and discharged. Where conventional drainage is difficult, costly, or restricted by site conditions, drainage-free automatic bollards may provide a more suitable alternative by reducing dependence on an external drainage system.
Before continuing, remove loose soil, debris, and standing water from the excavation area.
2. Measure and Mark the Bollard Positions
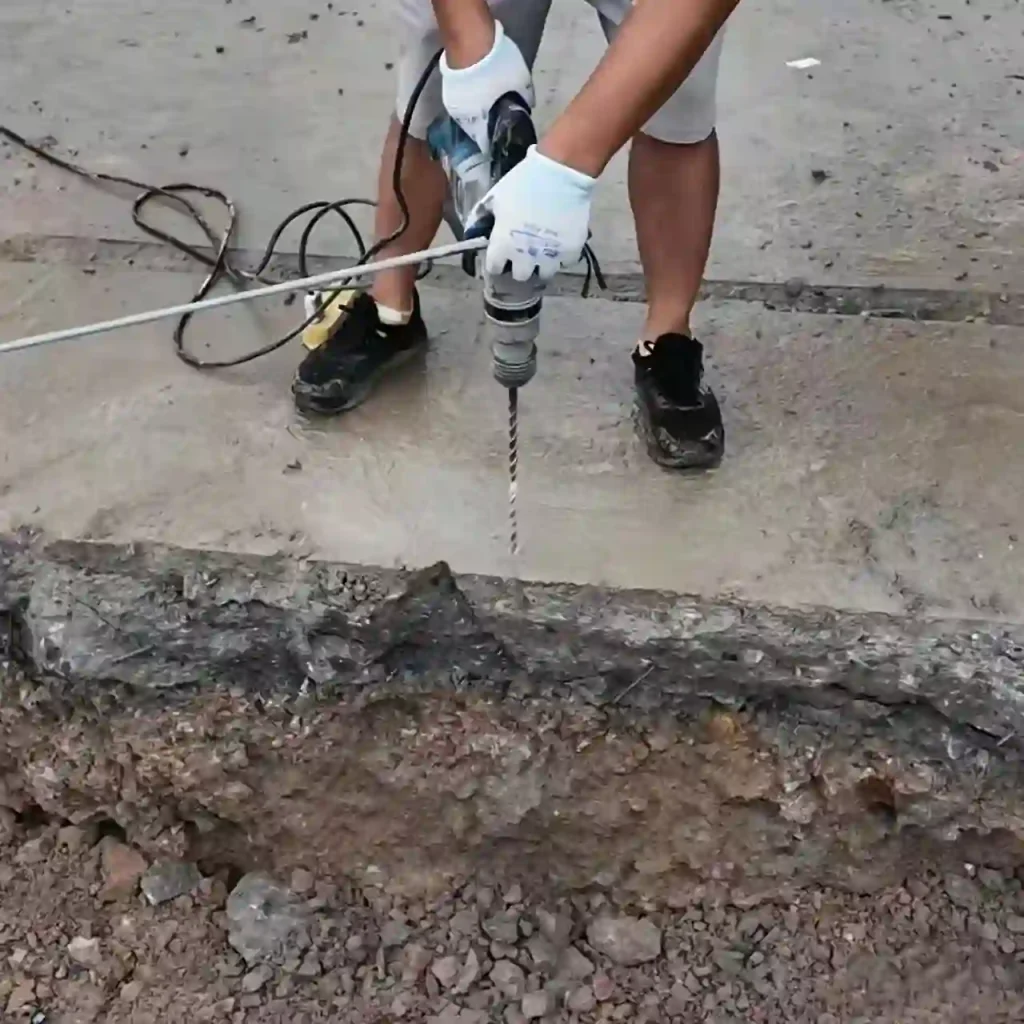
Measure the available clear space and calculate the position and spacing of each bollard.
Mark every installation point clearly. When several automatic bollards are installed in a row, their center points should follow the same straight reference line, and the spacing between adjacent units should remain consistent.
Accurate marking at this stage makes the subsequent positioning and alignment work easier.
3. Fabricate and Secure the Fixing Frames
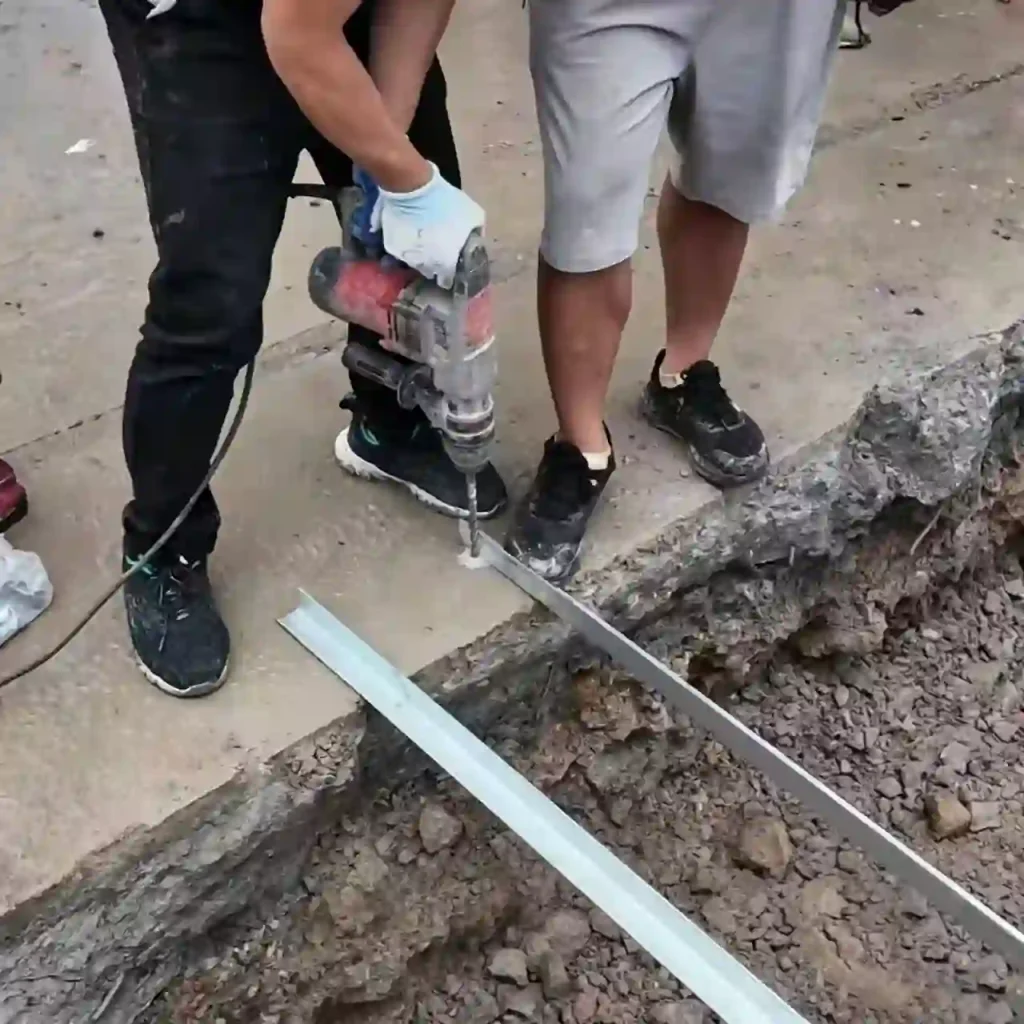
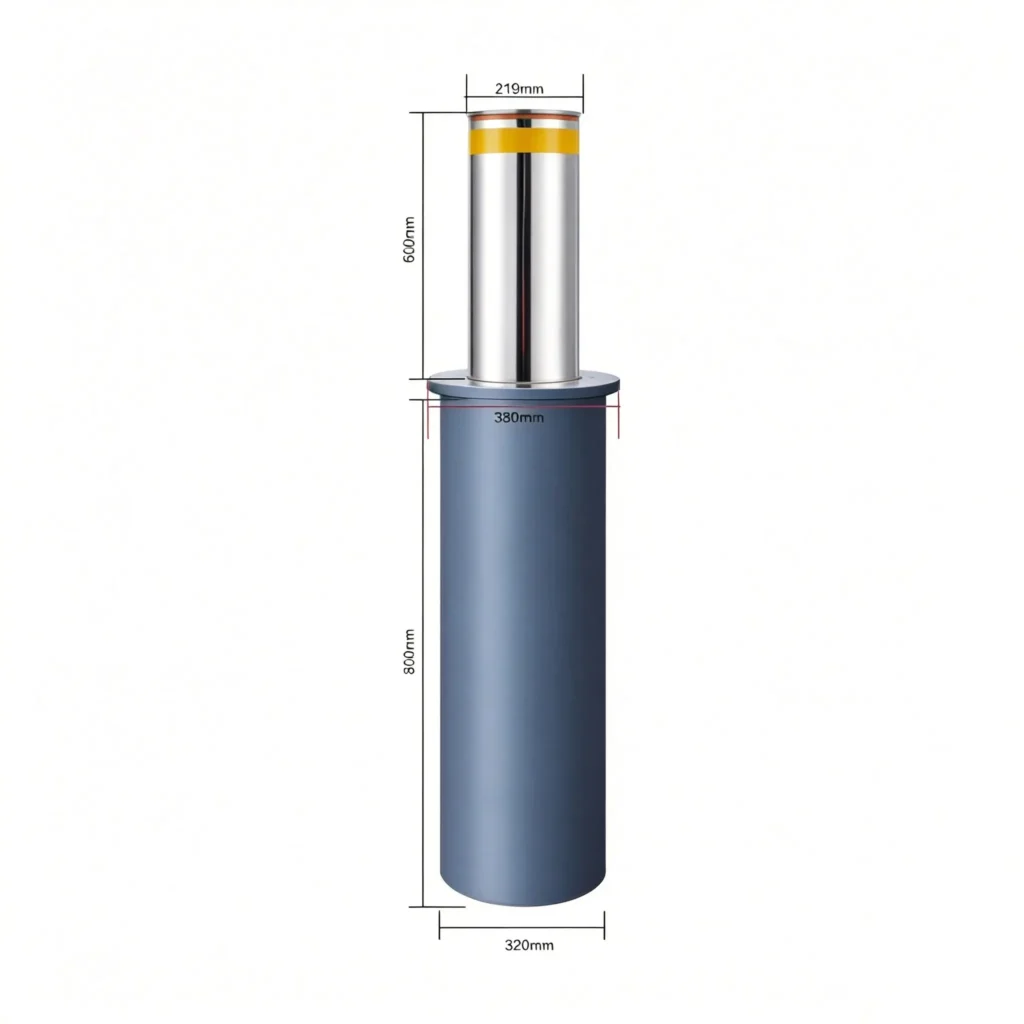
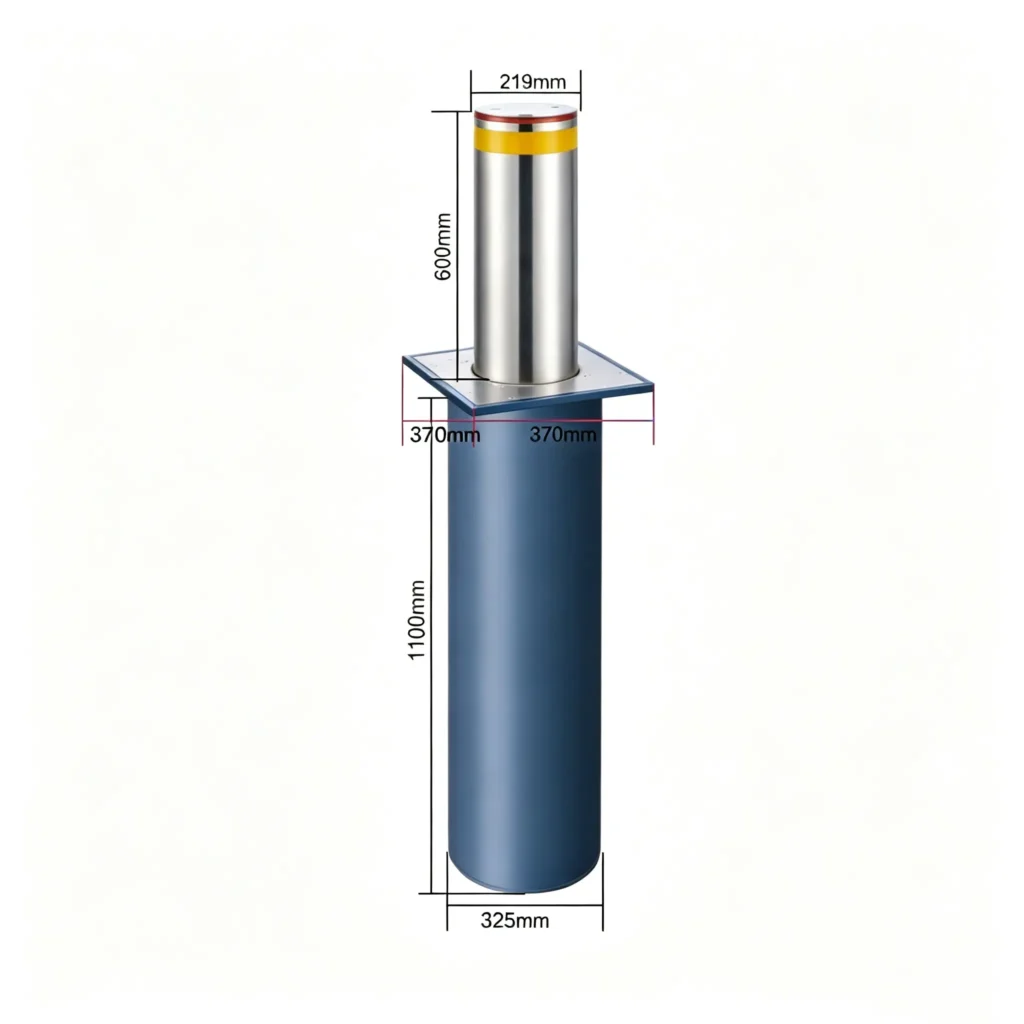
Fabricate the fixing frames according to the dimensions of the bottom section of each bollard. The frames should include suitable recesses or slots that hold the bollard bodies in the required positions.
Place each fixing frame at its marked location. Use expansion bolts for initial anchoring, and then reinforce the structure by welding.
The fixing frames must remain stable during bollard placement, alignment, and final welding.
4. Establish a Horizontal Reference Line
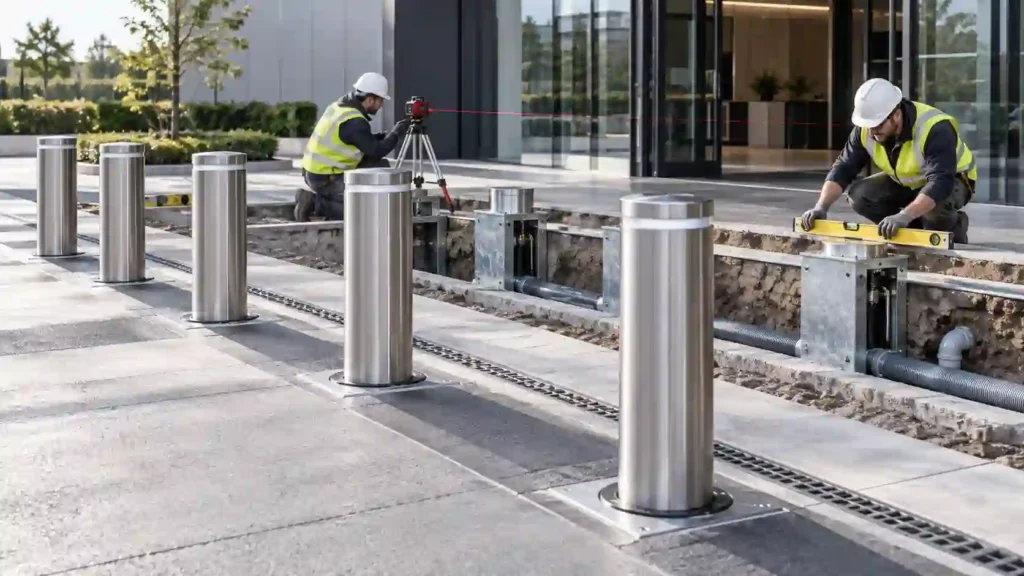
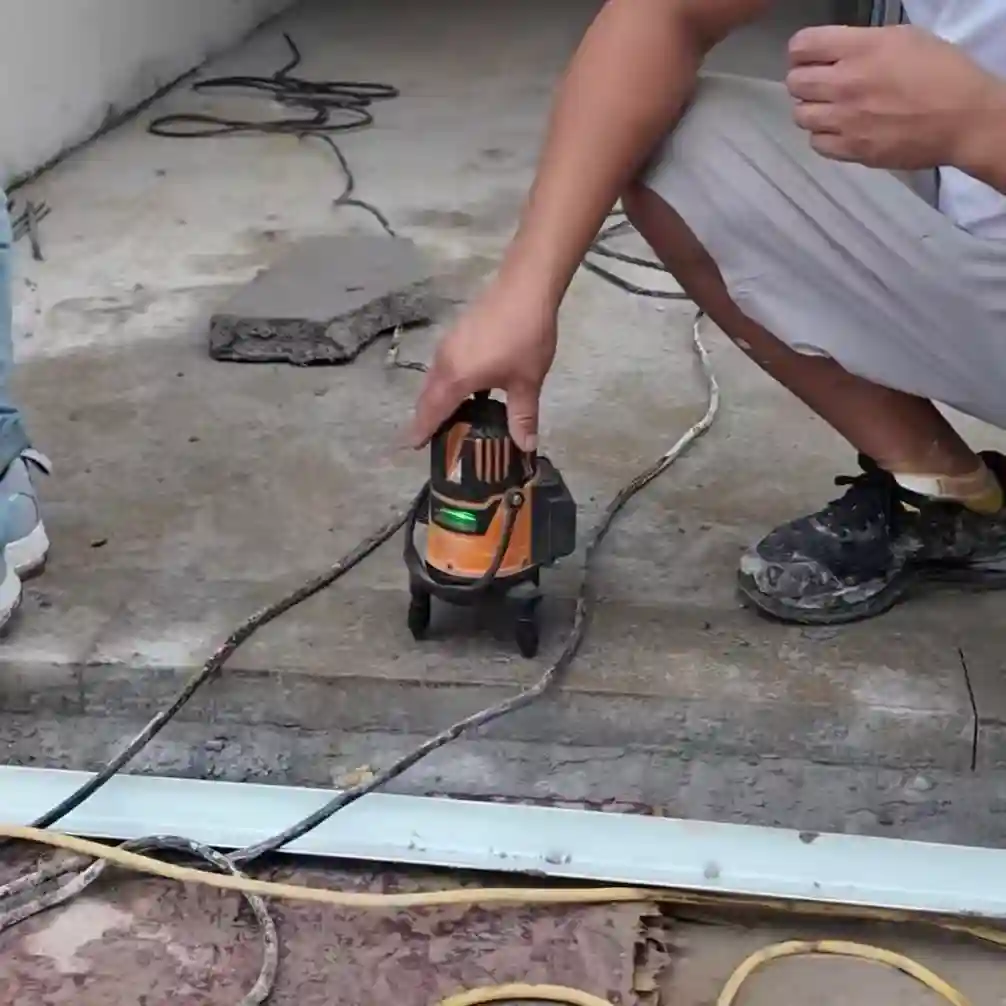
Use a leveling instrument to establish the required installation elevation.
Stretch a red reference line across the installation area and adjust it until it is completely level. This line will serve two purposes:
- Controlling the installation height of every bollard;
- Keeping the centers of all bollards in a straight line.
Check the reference line carefully before placing the bollards.
5. Position the Automatic Bollards
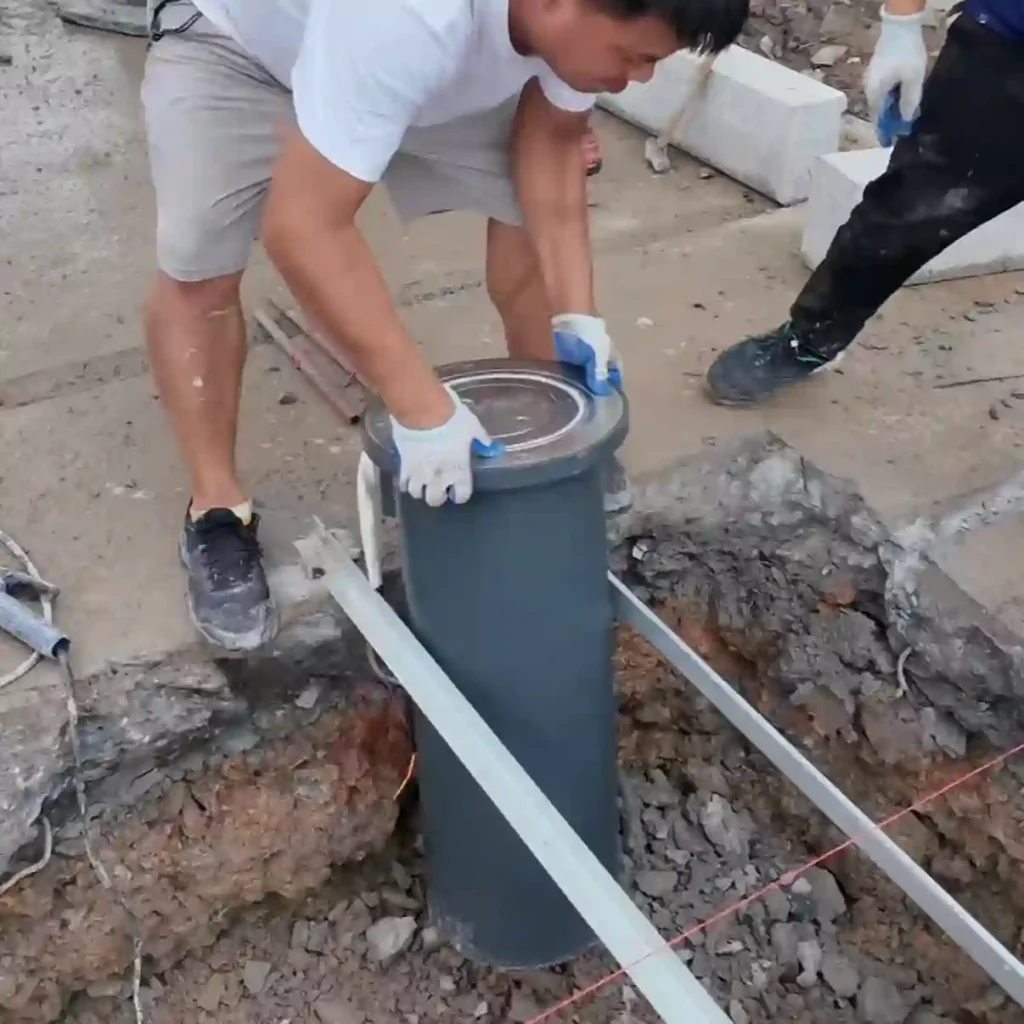
Place the automatic bollards one by one into the recesses of the fixing frames.
Handle each unit carefully to avoid damaging the stainless steel surface, electrical cables, connectors, or drainage outlet. All drainage outlets should face the same direction so that they can be connected to the drainage system more efficiently.
At this stage, keep the bollards temporarily positioned because their height and alignment still need to be adjusted.
6. Adjust the Height and Alignment
Measure the height of each bollard and adjust it until the top reaches the established horizontal reference line.
The center of each bollard should also align with the red line. This ensures that all units form a straight and orderly row.
Use a spirit level to check the vertical alignment of each bollard. Continue adjusting until every unit meets the following conditions:
- The tops are at the same elevation;
- The centers follow the reference line;
- The bollard bodies are vertical;
- The spacing is consistent.
This is one of the most important stages of the automatic bollard installation process.
7. Weld the Bollards in Place
After confirming the height, center position, and vertical alignment, weld the bollards securely to the fixing frames.
Because welding may cause minor movement, check the height and alignment again after the work is completed. Make any necessary corrections before proceeding with the pipe and cable connections.
8. Connect the Cables and Drainage Pipes
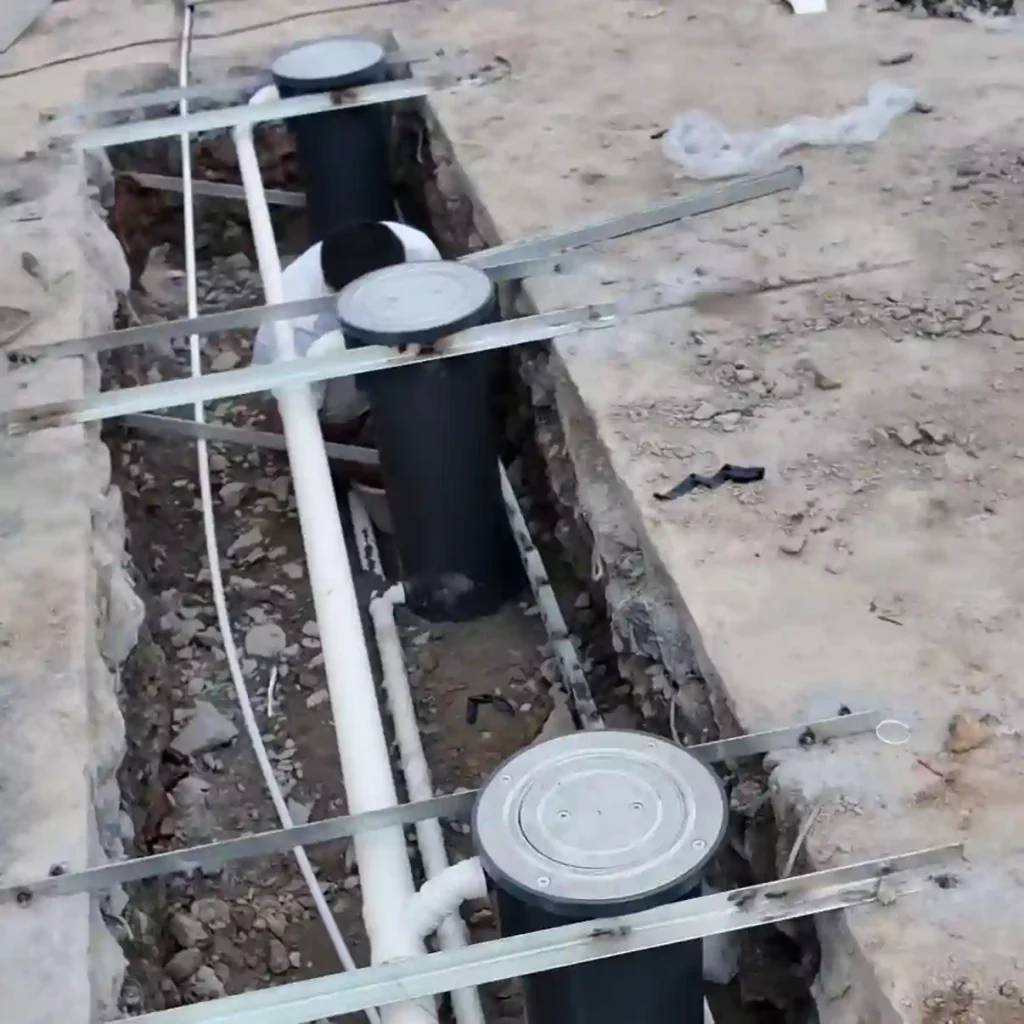
Because this installation method is designed for bollards that rely on external drainage, every bollard drainage outlet must be connected to the designated drainage system before the foundation is backfilled or sealed.
Open the top cover of each bollard to access its internal cables and connection points.
Route the electrical wires through suitable protective conduits and connect the automatic bollards to the power and control circuits in sequence. Follow the specified wiring order and ensure that every electrical connection is secure.
Next, connect the drainage outlets with suitable pipes. Join the outlets one by one and route the final drainage pipe to the previously installed drainage well.
Before closing the bollards, confirm that:
- The cables are connected in the correct order;
- The wires are not pinched or excessively bent;
- The drainage pipe joints are secure;
- The drainage route is unobstructed.
9. Waterproof and Insulate the Connections
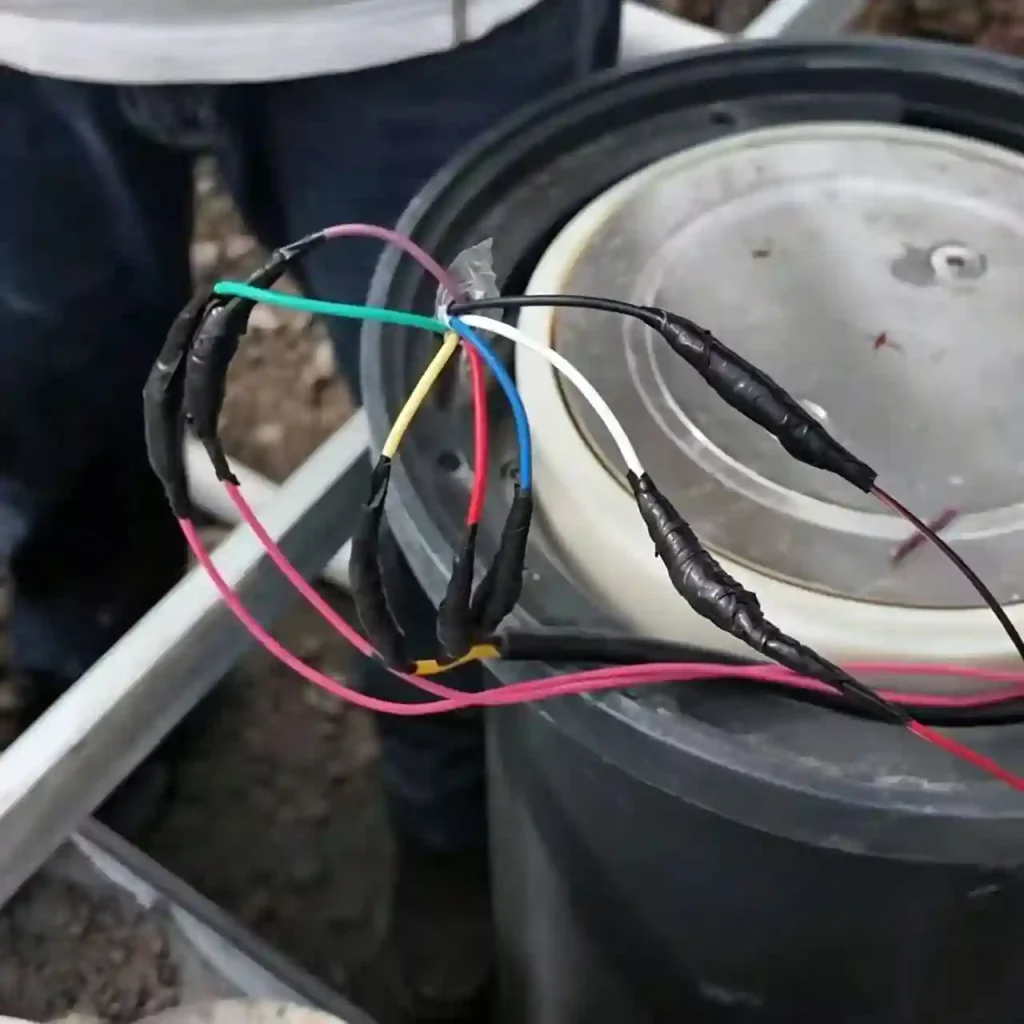
Once the electrical connections are complete, wrap each joint tightly with waterproof tape and electrical insulation tape.
This helps prevent moisture from entering the cable connections and reduces the risk of short circuits, corrosion, and control failures.
Arrange the wires neatly inside each bollard. After confirming that the connections are protected and secure, reinstall the bollard covers.
10. Connect, Test, and Install the Control Box
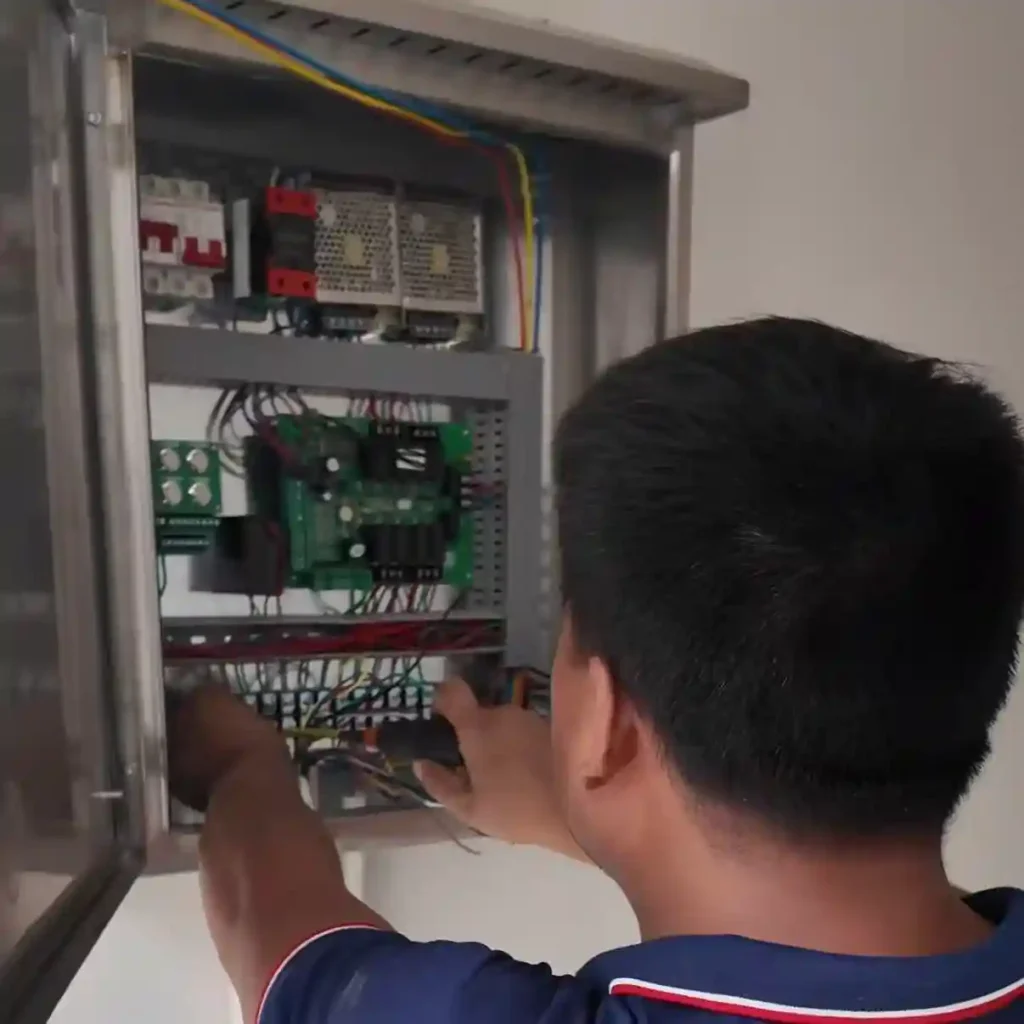
Connect the automatic bollards to the control box according to the required terminal arrangement.
Before permanently mounting the control box, use a temporary power supply to test the system. Check whether every bollard rises and lowers correctly and whether multiple units operate as intended.
Once the test has been completed successfully:
- Select a suitable wall-mounted position.
- Mark and drill the mounting holes.
- Secure the control box to the wall.
- Connect the permanent power supply.
- Perform a final operating test.
The control box should be mounted in a location that is secure, accessible, and protected from unnecessary exposure to water.
Key Installation Considerations
Successful automatic bollard installation depends on several details:
- Maintain consistent spacing between the bollards.
- Keep all bollard tops at the same elevation.
- Align the bollard centers along one straight line.
- Ensure that every bollard is vertical.
- Keep all drainage outlets facing the same direction.
- Connect the drainage pipes without obstruction.
- Waterproof and insulate all electrical joints.
- Test the complete system before permanently mounting the control box.
Frequently Asked Questions
Why do automatic bollards need a drainage system?
Because the main body of an automatic bollard is installed underground, rainwater and surface water may collect around it. A suitable drainage system helps prevent prolonged water accumulation around the equipment.
What should be checked before the bollards are welded?
Before welding, check the installation height, center-line position, spacing, vertical alignment, and drainage outlet direction of every bollard.
When should the control box be permanently installed?
The control box should be permanently mounted only after the bollards have been connected and successfully tested with a temporary power supply.
Conclusion
Installing automatic bollards requires accurate measurement, careful leveling, reliable fixation, organized pipework, waterproof electrical connections, and complete system testing.
The most important objective is not simply to secure each bollard in the ground, but to ensure that the entire system is properly aligned, protected from water, and able to operate consistently. Where site drainage is difficult to construct, consider whether a drainage-free bollard solution is better suited to the project.